 Anabelle McLean
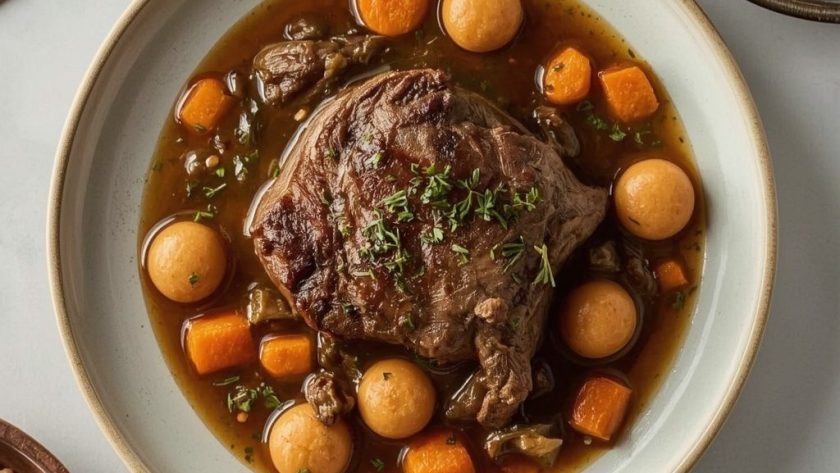
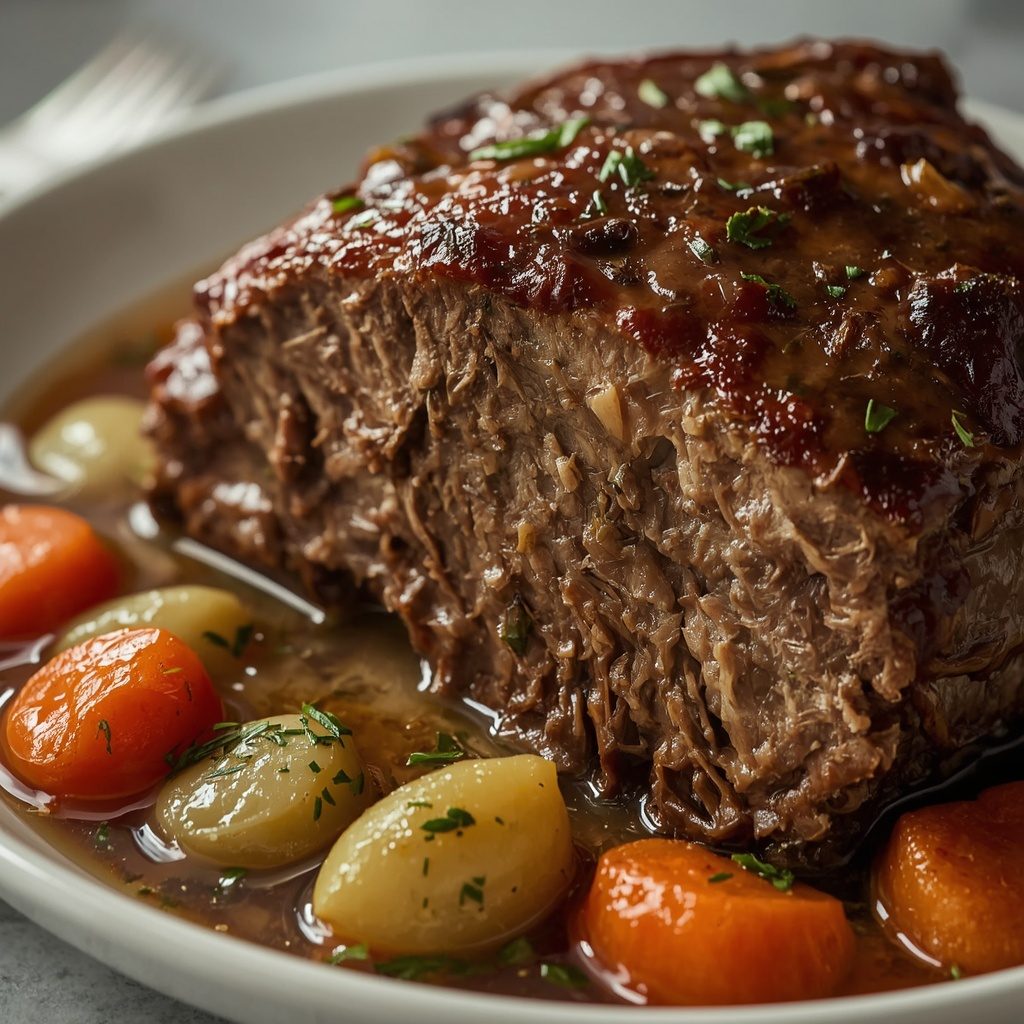
 Pioneer Woman Pot Roast is the kind of Sunday supper that fills the house with a savory, onion-and-thyme aroma before the meat even hits the table. A 3-pound beef chuck roast gets seared hard, then braised low and slow with carrots, celery, garlic, tomato paste, and fresh rosemary until it shreds under a fork. The result is deeply beefy, silky, and coated in a rich, herb-flecked gravy.
Total time runs 265 minutes, mostly hands-off oven time at 325°F. This is a beginner-friendly recipe — the only step that needs real attention is the initial sear, which builds the flavor base for everything that follows. Make it on a cold weekend afternoon when you want dinner to take care of itself for a few hours.
What is Pioneer Woman Pot Roast?
This dish is a classic American braised beef roast made with chuck, aromatic vegetables, tomato paste, flour, and beef stock, all cooked together in a heavy Dutch oven. The meat sears first for a crust, then braises in liquid for three and a half hours until fork-tender.
Every bite pulls apart with almost no resistance, and the gravy has a velvety, slightly thickened texture from the flour and reduced stock. The flavor lands somewhere between savory beef stew and Sunday roast — rich, herbaceous, and satisfying without being fussy. It is the kind of rustic comfort food that works for family dinners and holidays alike.
Why You Should Try This Recipe
- Hands-off cooking — After the sear and vegetable sauté, the oven does nearly all the work for over three hours.
- One-pot cleanup — Everything from browning to braising happens in a single Dutch oven, which keeps dishes to a minimum.
- Budget-friendly cut — Chuck roast is inexpensive but becomes incredibly tender with slow, low-heat braising.
- Built-in gravy — The braising liquid reduces into a rich, silky sauce without needing a separate recipe.
- Leftovers improve — The flavors deepen overnight, so tomorrow’s sandwiches or tacos taste even better than tonight’s dinner.
Ingredients Needed to Make Pioneer Woman Pot Roast
You probably have most of these pantry staples already. The only real investment is the chuck roast itself.
Meat
- 3 lb boneless beef chuck roast — Trimmed of excess fat and patted completely dry. The dry surface is critical for a proper sear, so do not skip the paper towel step.
Aromatics and Vegetables
- 2 medium yellow onions — Peeled and sliced into thick half-moons, about 3 cups. They sweeten as they braise and thicken the sauce.
- 4 medium carrots — Peeled and cut into 2-inch chunks, about 2 cups. Chunkier cuts hold their shape through the long cook.
- 3 stalks celery — Cut into 2-inch pieces, about 1 1/4 cups. Adds a savory, earthy backbone.
- 4 cloves garlic — Smashed and peeled. Smashing releases the oils faster than mincing and keeps the garlic from burning.
Liquids and Flavor Builders
- 2 tbsp tomato paste — Caramelized in the pot to deepen its sweetness and remove the raw tinny edge.
- 2 tbsp all-purpose flour — Cooked into the vegetables to form the thickening base for the braising liquid.
- 1 tsp dried thyme — Earthy and slightly floral, it stands up to the long braise better than fresh would.
- 2 bay leaves — Removed before serving, but essential for that layered savory note.
- 2 cups low-sodium beef stock — Low-sodium lets you control the salt level as the liquid reduces.
- 1 tbsp Worcestershire sauce — Adds umami and a subtle tang that rounds out the beefiness.
- 3 sprigs fresh rosemary — Tied together with kitchen twine so the stems stay contained and easy to remove.
Seasoning and Fats
- 2 tsp kosher salt — Divided between the sear and the braising liquid.
- 1 tsp freshly cracked black pepper — Divided the same way.
- 3 tbsp olive oil — Divided for searing and sautéing the vegetables.
- 2 tbsp unsalted butter — Added to the pot for the vegetable cook, which gives the onions and carrots a richer flavor.
- 2 tbsp fresh parsley — Finely chopped, used only as a bright garnish at the end.
Step by Step Instructions to Prepare Pioneer Woman Pot Roast
Follow these steps in order — the sear, the vegetable base, and the long braise each build on the one before. Here is the full breakdown, with warnings where things can go wrong.
- Preheat and prep — Set the oven to 325°F / 163°C with the rack in the lower third. Pull the chuck roast from the fridge 45 minutes before cooking and blot every surface dry with paper towels. A wet roast will steam instead of sear, and you will lose that deep crust.
- Season the meat — Rub the roast on all sides with 1 1/2 teaspoons kosher salt and 3/4 teaspoon black pepper, pressing the seasoning firmly into the meat with your fingertips. Let it sit at room temperature while the oven finishes preheating.
- Sear the first side — Heat 2 tablespoons olive oil in a 5 to 6-quart enameled cast-iron Dutch oven over medium-high heat until the oil shimmers and begins to haze but does not smoke. Lay the roast into the pot away from you to avoid splatter, and sear for 4 to 5 minutes without moving it, until a deep mahogany crust forms and the meat releases easily from the pot bottom. If it sticks, it is not ready to turn.
- Sear the remaining sides — Turn the roast with sturdy tongs and sear the other sides, about 3 to 4 minutes per side, until the entire exterior is uniformly browned. Transfer the roast to a large plate, leaving the rendered drippings and browned bits in the pot.
- Start the vegetables — Reduce the heat to medium and add the remaining 1 tablespoon olive oil and 2 tablespoons butter to the pot. Once the butter melts and the foam subsides, add the sliced onions, carrots, and celery. Stir to coat everything in the fat and scrape up the browned bits from the pot bottom.
- Soften the aromatics — Cook the vegetables for 8 to 10 minutes, stirring occasionally, until the onions have softened, turned translucent, and started showing golden edges. Add the smashed garlic cloves and cook for 1 minute more, stirring constantly, until you can smell the garlic’s aroma rising from the pot.
- Caramelize the tomato paste — Push the vegetables to one side of the pot and add the tomato paste directly to the cleared surface. Cook it undisturbed for 1 minute, then stir it through the vegetables. This step removes the raw metallic edge and deepens the flavor of the finished gravy.
- Cook the flour — Sprinkle the flour over the vegetables and stir continuously for 1 to 2 minutes, until the flour no longer appears raw white and smells lightly toasted. The mixture will look slightly dry and cling to the vegetables. That is exactly what you want — it forms the thickening base for the braising liquid.
- Build the braising liquid — Pour in the beef stock in a steady stream while scraping the bottom of the pot with a wooden spoon to dissolve every bit of browned fond. Add the Worcestershire sauce, dried thyme, and the remaining 1/2 teaspoon salt and 1/4 teaspoon black pepper. Bring the liquid to a simmer over medium heat, stirring until it thickens slightly.
- Return the roast — Nestle the seared roast back into the pot, settling it down into the liquid and vegetables. Tuck the rosemary bundle and the 2 bay leaves into the liquid around the meat, making sure the herbs are submerged so they release their oils into the braise.
- Braise in the oven — Cover the Dutch oven with its lid and transfer to the preheated oven. Braise for 3 hours and 30 minutes at 325°F / 163°C. Resist the urge to open the oven during the first 2 hours — every peek drops the temperature and extends the cook time.
- Check for doneness — The roast is done when a fork slides into the center with absolutely no resistance and the meat visibly begins to shred when twisted. At that point, the internal temperature should read 200°F to 205°F / 93°C to 96°C on an instant-read thermometer. That range ensures the collagen has fully converted to gelatin, which is what makes the meat pull apart so easily.
- Rest the meat — Carefully transfer the pot roast to a serving platter and tent loosely with aluminum foil. Let it rest for 15 minutes while you finish the gravy. Resting allows the juices to redistribute through the meat so they do not run out when carved.
- Finish the gravy — Skim the excess fat from the surface of the braising liquid with a wide spoon, then remove and discard the bay leaves and rosemary stems. Simmer the liquid over medium heat for 5 to 7 minutes, stirring frequently, until it has reduced to a rich, coating gravy consistency. Taste and adjust seasoning, then carve or shred the pot roast and spoon the gravy and vegetables over the meat. Garnish with the chopped fresh parsley and serve hot.
What Goes Well With Pioneer Woman Pot Roast
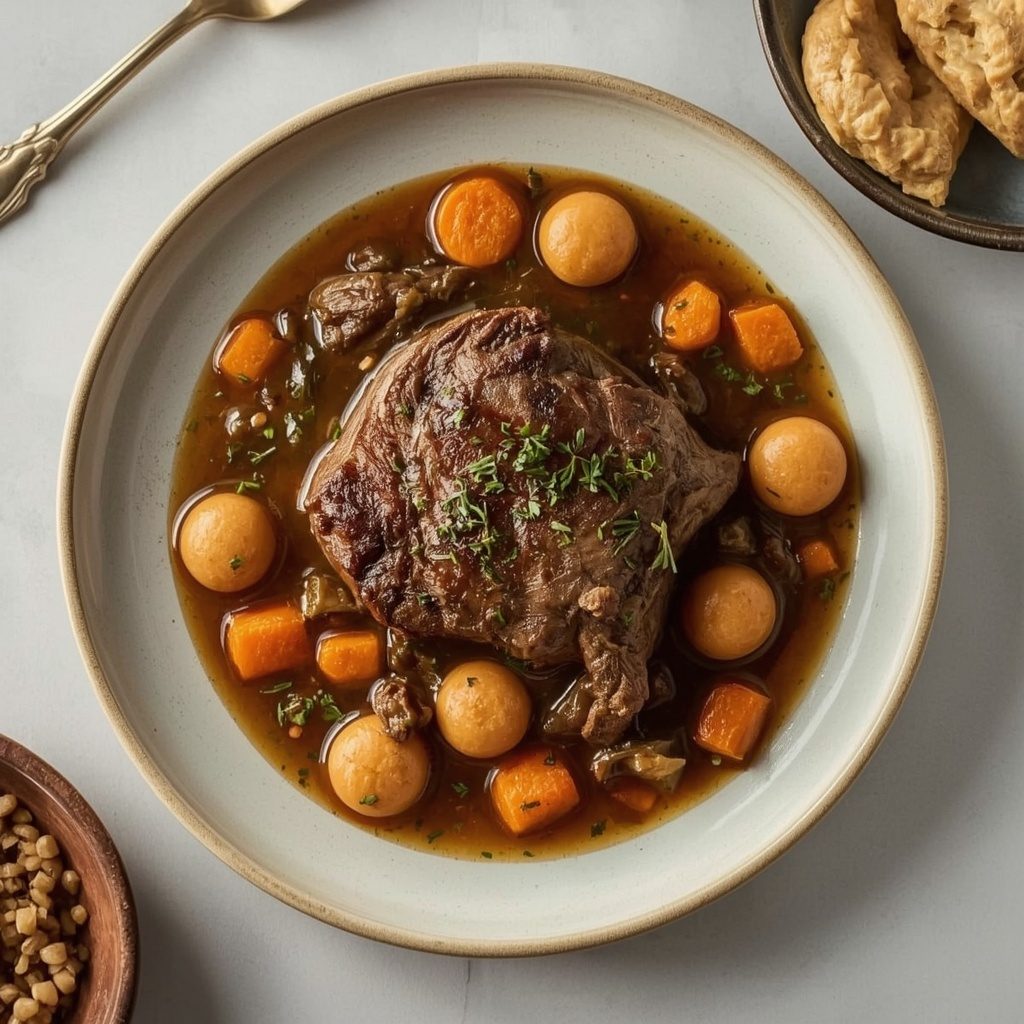
This braise already includes vegetables and a rich gravy, so the best sides are simple starches and bright, contrasting textures. Here are six pairings worth considering.
- Buttery mashed potatoes — The silky potatoes catch every drop of the reduced gravy and turn the plate into pure comfort food.
- Egg noodles — Wide, soft noodles soak up the braising liquid beautifully and give the dish a stroganoff-like feel.
- Crusty sourdough bread — A thick slice is perfect for swiping through the last of the sauce.
- Roasted green beans — Their crisp, slightly charred edges add a fresh, vegetal snap that cuts through the richness.
- Simple side salad — Something sharp and acidic, like a lemon vinaigrette over arugula, balances the heavy, savory flavors.
- Red wine or iced tea — A full-bodied red wine works well for dinner, while strong iced tea keeps things casual for a weeknight.
Essential Tips for Perfecting Pioneer Woman Pot Roast
Here is what tripped me up the first few times and what I have learned since.
- Dry the meat twice — Blot the chuck roast with paper towels right before searing, not just when you pull it from the fridge. Even a thin film of surface moisture ruins the crust.
- Do not crowd the pot — A 5 to 6-quart Dutch oven gives the roast enough room to sear properly. A smaller pot traps steam and creates gray, boiled-looking patches.
- Resist the urge to peek — Opening the oven during the first 2 hours of braising lowers the chamber temperature dramatically. Each peek can add 15 to 20 minutes to the total cook time.
- Check for doneness by feel — The temperature reading matters, but the twist test is what really tells you it is ready. If the fork meets any resistance, give it another 20 to 30 minutes.
- Caramelize the tomato paste properly — Undisturbed, direct contact with the hot pot surface for just 1 minute transforms it from raw and acidic to sweet and rich. Buzz past it and the paste scorches, turning bitter.
- Skim the fat before reducing — A wide spoon run across the surface of the liquid removes the excess rendered fat, leaving you with a cleaner, glossier gravy that coats instead of greases.
Variations of Pioneer Woman Pot Roast
Once you have the base method down, small swaps create entirely different meals. These variations keep the technique intact while shifting the flavor profile.
- Mushroom and onion version — Add 8 ounces of quartered cremini mushrooms to the pot with the vegetables. They release liquid as they cook and add an earthy, umami-rich depth to the gravy.
- Herb-swap rosemary for oregano — Replace the fresh rosemary with 4 sprigs of fresh oregano or a full teaspoon of dried oregano for a slightly more Mediterranean profile.
- Root vegetable twist — Swap the celery for parsnips or add 2 cups of cubed turnips along with the carrots. They become sweet and tender during the long braise.
- Spiced version — Add 1 teaspoon of smoked paprika and a pinch of cayenne with the dried thyme. The warmth builds slowly without overwhelming the beef.
- Potato-studded braise — Tuck 1 pound of halved baby potatoes around the roast before it goes into the oven. They absorb the braising liquid and turn golden on top.
Storing Pioneer Woman Pot Roast: Best Practices
Leftovers hold up well, and the flavors actually improve after a night in the fridge. Here is how to keep everything fresh.
- Refrigerator storage — Pack leftover pot roast in an airtight container, covered with gravy and vegetables. It keeps for up to 4 days, and the flavors deepen as it rests.
- Freezer storage — Portion the meat with gravy into freezer-safe containers, leaving 1 inch of headspace for expansion. Freeze for up to 3 months and thaw overnight in the refrigerator.
- Separate the vegetables if desired — Carrots and celery can get mushy in the freezer. If you prefer better texture, freeze the meat and gravy together and store the vegetables separately in the fridge.
- Label everything — Write the date and contents on each container. Frozen braised meat looks identical to stew or chili at a glance.
Reheating Pioneer Woman Pot Roast: Best Practices
Gentle, low heat is the rule here. High heat dries out the shredded meat fast and breaks the gravy.
- Stovetop method — Warm refrigerated roast in a covered skillet or Dutch oven over medium-low heat with a splash of beef stock. Heat for about 10 to 12 minutes, stirring occasionally, until heated through.
- Oven method for frozen portions — Reheat covered in a 325°F / 163°C oven for 30 to 40 minutes. Check it halfway and add a little stock if the gravy looks too thick.
- Microwave for single servings — Place a portion in a microwave-safe bowl, add a tablespoon of beef stock or water, cover, and heat in 45-second bursts, stirring between each round.
- Stir vigorously after freezing — The gravy may separate slightly when frozen. A brisk stir while reheating re-emulsifies it back into a smooth sauce.
FAQs
Can I freeze Pioneer Woman Pot Roast?
Yes. Portion the meat with gravy into freezer-safe containers, leaving 1 inch of headspace, and freeze for up to 3 months. Thaw overnight in the refrigerator before reheating.
How long does Pioneer Woman Pot Roast last in the fridge?
Stored in an airtight container and covered with gravy and vegetables, it keeps for up to 4 days. The flavor actually improves as it rests, so it is an excellent make-ahead meal.
What temperature should the meat reach before it is done?
The roast is done when it reads 200°F to 205°F / 93°C to 96°C on an instant-read thermometer. That range ensures the collagen has converted to gelatin, which gives the meat its shredding texture.
Do I have to sear the roast before braising?
Yes, for the best flavor, searing is not optional. The browned crust and the fond left in the pot create the deep, savory foundation for the entire dish. Skipping it yields a much flatter-tasting roast.
Can I make this gluten-free?
You can swap the all-purpose flour for a gluten-free flour blend, but expect a slightly thinner gravy. Alternatively, leave the flour out and reduce the simmering liquid a few minutes longer to thicken it naturally.
Why is my pot roast tough?
A tough pot roast almost always means it was undercooked, not overcooked. Chuck roast needs to reach 200°F to 205°F / 93°C to 96°C so the connective tissue fully breaks down. Give it more time until a fork twists through with zero resistance.
Final Words
This Pioneer Woman Pot Roast is proof that a few humble ingredients and a patient oven can turn an inexpensive cut of beef into something genuinely special. The sear, the vegetables, and the long braise all do their part, and the payoff is a roast that falls apart under your fork every single time. Make it once, and it will likely land in your regular rotation before the leftovers are gone.
Print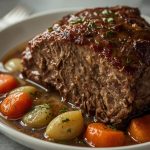
Pioneer Woman Pot Roast
- Prep Time: 25
- Cook Time: 240
- Total Time: 265
- Yield: 4 1x
- Category: Main Course
- Method: Oven Braising
- Cuisine: American
Description
A deeply savory, fork-tender chuck roast braised low and slow with aromatic vegetables, fresh herbs, and rich beef stock. The meat develops a caramelized crust from searing, then melts into a silky, savory gravy infused with onion, carrot, and thyme. This classic American comfort food delivers a rustic, satisfying texture with every bite falling apart under the fork.
Ingredients
- 3 lb boneless beef chuck roast, trimmed of excess fat and patted completely dry with paper towels
- 2 tsp kosher salt, divided
- 1 tsp freshly cracked black pepper, divided
- 3 tbsp olive oil, divided
- 2 tbsp unsalted butter
- 2 medium yellow onions, peeled and sliced into thick half-moons (about 3 cups)
- 4 medium carrots, peeled and cut into 2-inch chunks (about 2 cups)
- 3 stalks celery, cut into 2-inch pieces (about 1 1/4 cups)
- 4 cloves garlic, smashed and peeled
- 2 tbsp tomato paste
- 2 tbsp all-purpose flour
- 1 tsp dried thyme
- 2 bay leaves
- 2 cups low-sodium beef stock
- 1 tbsp Worcestershire sauce
- 3 sprigs fresh rosemary, tied together with kitchen twine
- 2 tbsp fresh parsley, finely chopped, for garnish
Instructions
- Preheat oven to 325°F / 163°C with the oven rack positioned in the lower third of the oven. Remove the chuck roast from refrigeration 45 minutes before cooking and blot all surfaces dry with paper towels; a dry surface is critical for achieving a deep browned crust.
- Season the roast on all sides with 1 1/2 teaspoons of the kosher salt and 3/4 teaspoon of the black pepper, pressing the seasoning firmly into the meat with your fingertips. Allow the seasoned roast to sit at room temperature while the oven finishes preheating.
- Heat 2 tablespoons of the olive oil in a 5 to 6-quart enameled cast-iron Dutch oven over medium-high heat until the oil shimmers and begins to haze but does not smoke. Carefully lay the roast into the pot away from you to avoid splatter, and sear on the first side without moving it for 4 to 5 minutes, until a deep mahogany crust forms and the meat releases easily from the pot bottom.
- Turn the roast with sturdy tongs and sear the remaining sides, about 3 to 4 minutes per side, until the entire exterior is uniformly browned. Transfer the roast to a large plate and set aside, leaving the rendered drippings and browned bits in the pot.
- Reduce the heat to medium and add the remaining 1 tablespoon olive oil along with the 2 tablespoons unsalted butter to the pot. Once the butter has melted and the foam begins to subside, add the sliced onions, carrots, and celery, stirring to coat in the fat and scrape up the browned bits from the pot bottom.
- Cook the vegetables for 8 to 10 minutes, stirring occasionally, until the onions have softened, turned translucent, and started to show golden edges at the corners. Add the smashed garlic cloves and cook for 1 minute more, stirring constantly, until you can smell the garlic’s aroma rising from the pot.
- Push the vegetables to one side of the pot and add the tomato paste directly to the cleared surface. Cook the tomato paste undisturbed for 1 minute, then stir it through the vegetables; this caramelizes the paste and removes its raw metallic edge, deepening the flavor of the finished gravy.
- Sprinkle the flour over the vegetables and stir continuously for 1 to 2 minutes, cooking until the flour no longer appears raw white and smells lightly toasted. The flour will look slightly dry and cling to the vegetables — this forms the thickening base for the braising liquid.
- Pour in the beef stock in a steady stream while scraping the bottom of the pot with a wooden spoon to dissolve every bit of browned fond. Add the Worcestershire sauce, dried thyme, and the remaining 1/2 teaspoon salt and 1/4 teaspoon black pepper, then bring the liquid to a simmer over medium heat, stirring until it thickens slightly.
- Return the seared roast to the pot, nestling it down into the liquid and vegetables. Tuck the fresh rosemary bundle and the 2 bay leaves into the liquid around the meat, making sure the herbs are submerged so they release their oils into the braise.
- Cover the Dutch oven with its lid and transfer to the preheated oven. Braise for 3 hours and 30 minutes at 325°F / 163°C, resisting the urge to open the oven during the first 2 hours, then begin checking for doneness at the 3-hour mark by piercing the roast with a fork.
- The roast is done when a fork slides into the center with absolutely no resistance and the meat visibly begins to shred when twisted. At this point the internal temperature should read 200°F to 205°F / 93°C to 96°C on an instant-read thermometer — this temperature range ensures the collagen has fully converted to gelatin.
- Carefully transfer the pot roast to a serving platter and tent loosely with aluminum foil. Let it rest for 15 minutes while you finish the gravy; resting allows the juices to redistribute through the meat so they do not run out when carved.
- Skim the excess fat from the surface of the braising liquid with a wide spoon, then remove and discard the bay leaves and rosemary stems. Simmer the liquid over medium heat for 5 to 7 minutes, stirring frequently, until it has reduced to a rich, coating gravy consistency. Taste and adjust seasoning, then carve or shred the pot roast and spoon the gravy and vegetables over the meat. Garnish with the chopped fresh parsley and serve hot.
Notes
Storage: Refrigerate leftover pot roast in an airtight container, covered with gravy and vegetables, for up to 4 days. The flavors deepen as it rests. Freezing: Portion the meat with gravy into freezer-safe containers, leaving 1 inch of headspace, and freeze for up to 3 months. Thaw overnight in the refrigerator. Reheating: Gently warm refrigerated roast in a covered skillet or Dutch oven over medium-low heat with a splash of beef stock, about 10 to 12 minutes, until heated through; for frozen portions, reheat covered in a 325°F / 163°C oven for 30 to 40 minutes. Avoid high heat when reheating to prevent the shredded meat from drying out. The gravy may separate slightly when frozen; stir vigorously while reheating to re-emulsify. Leftover meat is also excellent turned into sandwiches, tacos, or folded into soft-cooked egg noodles.
Nutrition
- Calories: 620
- Sugar: 7g
- Sodium: 890mg
- Unsaturated Fat: 14g
- Carbohydrates: 18g
- Fiber: 3g
- Protein: 49g
- Cholesterol: 155mg
Keywords: pioneer woman pot roast, classic pot roast recipe, dutch oven pot roast, braised chuck roast, beef pot roast, comfort food dinner, sunday pot roast, slow braised beef, onion gravy pot roast, family dinner recipe, fall apart beef roast, oven braised roast