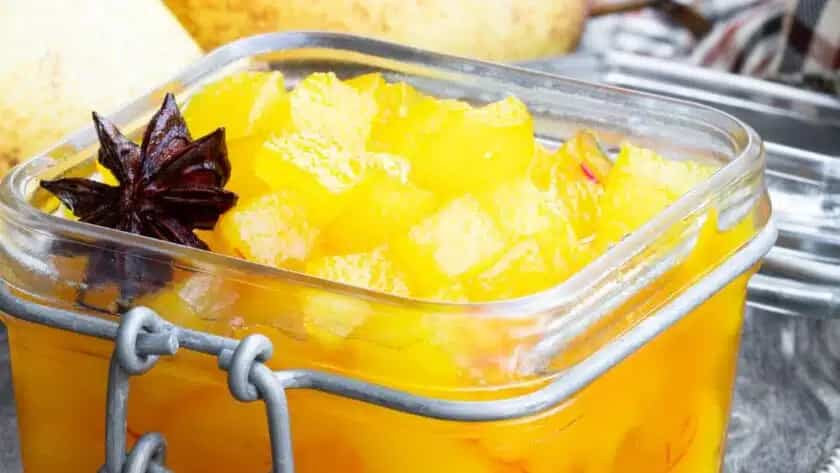
Today, I’m excited to share how to make Mary Berry Pear Chutney. This delightful recipe is a gem in British kitchens, celebrated for its sweet and tangy flavors that beautifully pair with a wide range of dishes. With just a prep time of 20 minutes and a cooking duration of about 1 to 1.5 hours, this pear chutney is not only easy to make but also a versatile condiment to elevate your meals.
What is Mary Berry Pear Chutney?
Mary Berry’s Pear Chutney is a flavorful condiment made from pears and a variety of spices. It strikes a perfect balance between sweet and sour, making it an ideal companion for cheese platters, roasts, and sandwiches.

Other Chutney Recipes
Why You Should Try This Recipe
- Flavor Enhancement: Elevates simple dishes with its unique blend of spices and sweetness.
- Versatile Use: Pairs wonderfully with a multitude of dishes.
- Long Shelf Life: Can be stored and savored over several months.
Ingredients Needed for Mary Berry Pear Chutney
- 1 kg ripe pears, peeled, cored, and chopped
- 250 g onions, finely chopped
- 100 g raisins
- 300 ml apple cider vinegar
- 250 g brown sugar
- 1 teaspoon ground ginger
- 1 teaspoon allspice
- 1 teaspoon mustard seeds
- A pinch of salt
Step-by-Step Instructions: How to Make Mary Berry Pear Chutney
- Prepare the Ingredients: Peel, core, and chop the pears; finely chop the onions.
- Combine in a Pot: Place all ingredients in a large saucepan.
- Cook: Bring to a boil and then reduce to a simmer for 1-2 hours until thickened.
- Sterilize Jars: Meanwhile, sterilize your jars and lids in boiling water.
- Fill and Seal: Spoon the hot chutney into sterilized jars and seal tightly.

What Goes Well With Mary Berry Pear Chutney
- Cheese Boards: A fantastic addition to a cheese and cracker selection.
- Roasted Meats: Complements pork and chicken beautifully.
- Sandwich Spreader: Elevates everyday sandwiches with its rich flavor.
Essential Tips for Perfecting Mary Berry Pear Chutney
- Use Ripe Pears: For a naturally sweeter chutney.
- Simmer Slowly: Allows flavors to meld beautifully.
- Sterilize Everything: Prevents contamination and extends shelf life.
- Check Consistency: The chutney should coat the back of a spoon when ready.
- Adjust Seasonings: Taste and adjust spices as needed before canning.
- Fill While Hot: Ensures a good seal and preserves the chutney longer.
Variations of Mary Berry Pear Chutney
- Spicy Kick: Add a chopped chili for extra heat.
- Tropical Twist: Mix in some diced mango for a fruity variation.
- Autumn Flavor: Incorporate a hint of cinnamon for a warm, seasonal touch.
Storing Mary Berry Pear Chutney: Best Practices
- Cool Completely: Before storing, let the chutney cool at room temperature.
- Airtight Containers: Use well-sealed jars to keep out moisture and air.
- Dark, Cool Place: Store in a cupboard away from direct sunlight.
Reheating Mary Berry Pear Chutney: Best Practices
- Gentle Heat: Reheat on the stove over low heat to preserve texture.
- Add a Splash: A bit of vinegar can refresh the flavors if needed.
Nutrition Value (per serving)
- Calories: 120 kcal
- Carbohydrates: 30 g
- Fat: 0.3 g
- Protein: 0.6 g
- Sodium: 5 mg
- Sugar: 28 g
FAQs
Can I Use Canned Pears for Mary Berry’s Pear Chutney?
Yes, canned pears can be used in a pinch, although fresh pears are recommended for the best flavor and texture. If using canned pears, ensure they are drained and rinsed to remove excess syrup.
How Long Does Mary Berry Pear Chutney Last?
When stored properly in sterilized, airtight jars, Mary Berry’s Pear Chutney can last up to 2 years in a cool, dark place. Once opened, keep it refrigerated and use within 4 weeks.
What Are the Best Pears to Use for Making Chutney?
For making chutney, firm pears like Conference or Bosc are ideal as they hold their shape and texture well during cooking. Avoid overly ripe or soft pears, which may turn mushy.
Is It Necessary to Peel the Pears Before Making the Chutney?
While peeling the pears is recommended to ensure a smoother texture, it’s not strictly necessary. If you prefer a more rustic chutney, you can leave the skins on; just be sure to wash them thoroughly.
Final Words
Mary Berry’s Pear Chutney is more than just a condiment; it’s essential for culinary enthusiasts aiming to enrich their dishes with depth and character. Perfect for seasoned chefs and home cooks alike, this chutney adds a touch of sophistication to any table. Enjoy the making process and savor your delicious creation!
Print
Mary Berry Pear Chutney
- Prep Time: 20
- Cook Time: 120
- Total Time: 2 hours 20 minutes
- Yield: 10–12 1x
- Category: Side Dish
- Cuisine: British
Description
Mary Berry’s Pear Chutney is a flavorful condiment made from pears and a variety of spices. It strikes a perfect balance between sweet and sour, making it an ideal companion for cheese platters, roasts, and sandwiches.
Ingredients
- 1 kg ripe pears, peeled, cored, and chopped
- 250 g onions, finely chopped
- 100 g raisins
- 300 ml apple cider vinegar
- 250 g brown sugar
- 1 teaspoon ground ginger
- 1 teaspoon allspice
- 1 teaspoon mustard seeds
- A pinch of salt
Instructions
- Prepare the Ingredients: Peel, core, and chop the pears; finely chop the onions.
- Combine in a Pot: Place all ingredients in a large saucepan.
- Cook: Bring to a boil and then reduce to a simmer for 1-2 hours until thickened.
- Sterilize Jars: Meanwhile, sterilize your jars and lids in boiling water.
- Fill and Seal: Spoon the hot chutney into sterilized jars and seal tightly.


