 Anabelle McLean
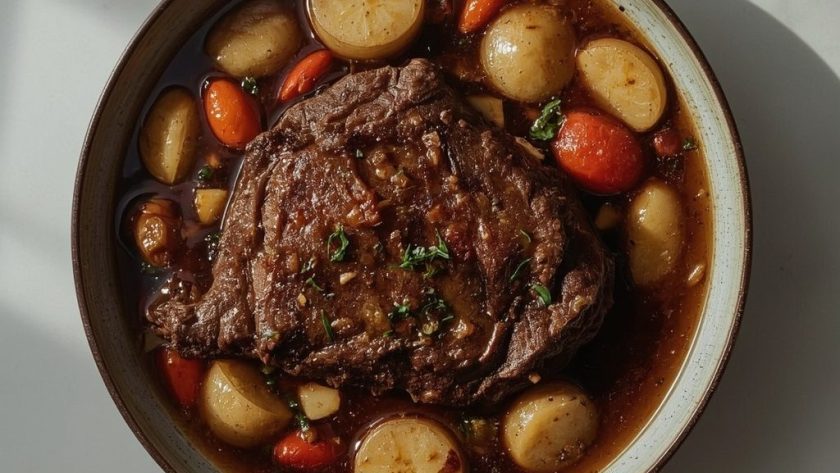
 A Joy of Cooking Pot Roast is the kind of meal that makes a slow Sunday feel worth it. It is a classic American braise where a beef chuck roast turns silky-tender after hours in a rich broth with onions, carrots, celery, and herbs. The result tastes deeply savory with a velvety, concentrated gravy that clings to every bite.
Total time runs 3 hours and 25 minutes, though most of that is hands-off oven time. This is an intermediate-level recipe — the searing and sauce-building steps need attention, but none of it is hard. It is best made on a cold weekend afternoon when the house can fill with that incredible slow-cooked aroma.
What is Joy of Cooking Pot Roast?
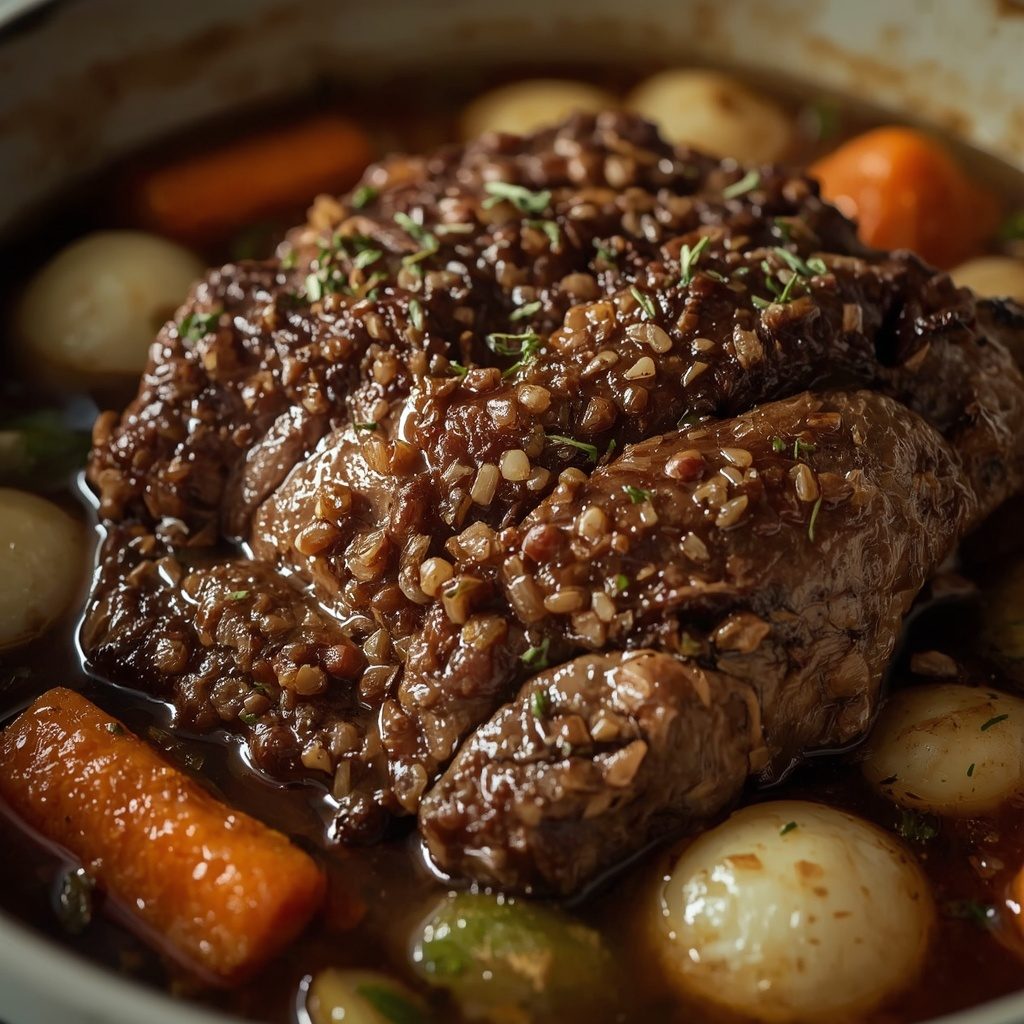
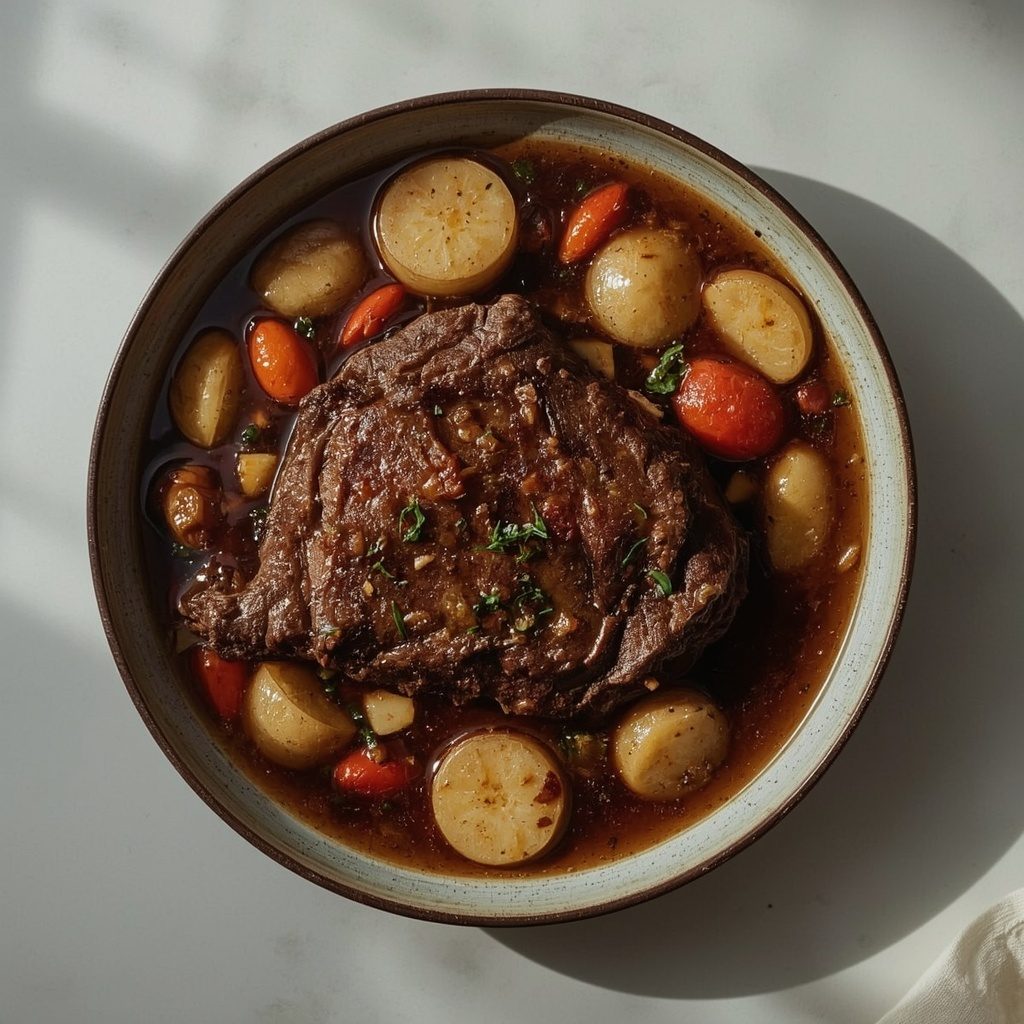
This dish is a braised beef chuck roast cooked low and slow in a Dutch oven with aromatic vegetables, garlic, tomato paste, beef broth, and fresh herbs. The meat first gets a deep sear, then simmers partially submerged in liquid until fork-tender. What you get is beef that nearly shreds on its own, surrounded by carrots, onions, and baby Yukon Gold potatoes that have soaked up all that braising liquid.
Why You Should Try This Recipe
- Deep, layered flavor — the seared crust, caramelized tomato paste, and fresh thyme build a gravy that tastes far more complex than the ingredient list suggests.
- One-pot cooking — everything cooks in a single Dutch oven, so cleanup stays minimal and the flavors stay concentrated.
- Hard to overcook — braising is forgiving. An extra 20 minutes in the oven only makes the meat more tender.
- Leftovers improve overnight — the flavors meld and deepen in the fridge, so a second meal often tastes even better.
- Feeds a small crowd — four generous servings with vegetables and gravy built right into the pot.
Ingredients Needed to Make Joy of Cooking Pot Roast
You probably have most of these already, but the chuck roast quality matters most here.
Meat and Seasonings
- 3 lb beef chuck roast — look for good marbling and tie it with kitchen twine if it is uneven, so it cooks uniformly.
- 2 tsp kosher salt, divided — used in stages: on the meat before searing and in the braising liquid.
- 1 tsp freshly ground black pepper, divided — fresh grinding makes a noticeable difference in a long braise.
For Searing and Sautéing
- 2 tbsp vegetable oil — its high smoke point lets you get a proper sear without burning.
- 2 tbsp unsalted butter — added after searing to sauté the vegetables with a richer flavor.
- 1 large yellow onion, cut into 1/2-inch wedges — wedges hold their shape better than diced onion during the long braise.
- 3 medium carrots, peeled and cut into 2-inch chunks — chunky cuts prevent them from turning to mush.
- 3 celery stalks, cut into 2-inch chunks — bring an earthy backbone to the braising liquid.
- 4 garlic cloves, smashed and peeled — smashed cloves release flavor more gently than minced garlic, which can burn.
For the Braising Liquid
- 2 tbsp tomato paste — cooked until brick-red, it adds umami and body to the gravy.
- 2 tbsp all-purpose flour — thickens the braising liquid into a proper gravy.
- 2 cups low-sodium beef broth — use low-sodium so you control the salt level.
- 1 cup water — rounds out the liquid without making the broth too intense.
- 2 bay leaves — add subtle herbal depth; remove them before serving.
- 4 sprigs fresh thyme — fresh thyme holds up better than dried through the long oven time.
- 1 sprig fresh rosemary — one sprig is plenty; rosemary can overpower a braise quickly.
- 1 tbsp Worcestershire sauce — adds a savory, almost meaty depth to the gravy.
Added Later
- 1 lb baby Yukon Gold potatoes, halved if larger than 1 1/2 inches — added in the last hour so they stay intact and soak up flavor.
- 1 tbsp fresh parsley, finely chopped, for garnish — a fresh, bright finish over the rich gravy.
Step by Step Instructions to Prepare Joy of Cooking Pot Roast
Follow these steps in order and the dish will come together without any guesswork.
- Bring meat to room temperature — pull the chuck roast from the fridge 45 minutes before cooking. Pat it completely dry with paper towels; surface moisture is the enemy of a good crust. Season all sides with 1 1/2 teaspoons kosher salt and 3/4 teaspoon black pepper, pressing the seasoning into the meat.
- Preheat and heat the oil — set the oven to 325°F / 163°C with the rack in the lower third. In a large Dutch oven over medium-high heat, add the vegetable oil and heat until it shimmers and ripples, around 2–3 minutes.
- Sear the first side — lay the roast into the hot oil away from you to avoid splatter. Do not move it for 4–5 minutes, until the bottom develops a deep brown crust that releases easily from the pot. If the meat sticks, give it one more minute.
- Sear the remaining sides — turn the roast with sturdy tongs and sear 3–4 minutes per side until deeply browned all over. This browning step builds the flavor foundation. Transfer the roast to a large plate.
- Sauté the vegetables — reduce the heat to medium and add the butter. Once the foam subsides, add the onion wedges, carrots, and celery. Cook 6–7 minutes, stirring occasionally and scraping up browned bits, until the onions turn translucent at the edges.
- Bloom the garlic and tomato paste — add the smashed garlic and tomato paste. Stir constantly for 1–2 minutes until the paste darkens to a deep brick color and the garlic smells fragrant. Do not let it scorch on the bottom.
- Build the braising liquid — sprinkle the flour over the vegetables and stir for 1 minute. Pour in the beef broth and water slowly while stirring to prevent lumps. Add the bay leaves, thyme sprigs, rosemary sprig, Worcestershire sauce, remaining 1/2 teaspoon salt, and remaining 1/4 teaspoon pepper. Scrape the bottom and sides of the pot to lift every bit of browned flavor.
- Return the roast to the pot — nestle the seared roast into the liquid; it should come about halfway up the sides, not fully submerge it. Bring to a gentle simmer over medium heat, then cover with the lid.
- Braise for 2 hours — transfer the covered pot to the oven. Check once at the 1-hour mark to ensure you see slow, lazy bubbles, not a rolling boil. If the liquid bubbles too vigorously, drop the oven temperature to 300°F / 149°C.
- Add the potatoes — after 2 hours, remove the pot and uncover. Nestle the halved baby Yukon Gold potatoes into the liquid around the meat. Cover and return to the oven for 45 minutes to 1 hour.
- Test for doneness — insert a fork into the thickest section and twist gently. The meat should offer almost no resistance and shred easily. Well-braised chuck reads 200–210°F / 93–99°C internally, when connective tissue has turned to gelatin.
- Rest the meat — move the roast to a cutting board and tent loosely with foil for 10–15 minutes. This lets the muscle fibers relax and reabsorb juices so every slice stays moist.
- Finish the gravy — skim excess fat from the surface of the braising liquid with a wide spoon. Remove the bay leaves, thyme sprigs, and rosemary sprig. Taste and adjust salt and pepper. For thicker gravy, simmer uncovered over medium heat for 5–10 minutes until reduced.
- Slice and serve — cut the rested roast against the grain into 1/2-inch pieces, or pull it into large chunks if it is fall-apart tender. Arrange on a warm platter with the vegetables, spoon the gravy over generously, garnish with parsley, and serve immediately.
What Goes Well With Joy of Cooking Pot Roast
The pot already delivers meat, vegetables, and gravy, so sides should stay simple and let the braise shine.
- Creamy mashed potatoes — the silky gravy soaks into them, making an already comforting plate even more so.
- Buttered egg noodles — wide noodles catch every bit of the rich braising liquid.
- Crusty sourdough bread — tear off chunks and swipe them through the gravy; no spoon needed.
- Simple green beans — lightly steamed with a squeeze of lemon adds a bright, fresh contrast to the deep beef flavor.
- Roasted Brussels sprouts — their slight bitterness balances the savory, buttery gravy.
- A crisp green salad — something with a sharp vinaigrette cuts through the richness and wakes up the palate.
Essential Tips for Perfecting Joy of Cooking Pot Roast
Here is what trips most people up the first few times.
- Dry the meat thoroughly — any moisture left on the surface steams instead of sears, and you lose that deep brown crust that anchors the flavor.
- Do not rush the sear — 4–5 minutes per side undisturbed feels long, but that caramelized surface is where the gravy gets most of its richness.
- Use a heavy pot with a tight lid — thin pots cause hot spots and uneven braising. A heavy Dutch oven keeps the temperature steady for hours.
- Keep the liquid halfway up the roast — fully submerging the meat steams it instead of braising it. You want the exposed top to develop concentrated flavor.
- Watch the simmer, not the clock — slow, lazy bubbles are the target. A rolling boil turns the meat tough and dries out the liquid.
- Resist the urge to check constantly — every time you lift the lid, the oven temperature drops and the braise stalls. Once per hour is plenty.
- Slice against the grain — cutting with the grain leaves long muscle fibers that feel stringy. Against the grain gives you tender, clean slices.
Variations of Joy of Cooking Pot Roast
These twists keep the same method but shift the flavor in new directions.
- Mushroom version — add 8 ounces of sliced cremini mushrooms when sautéing the vegetables. They release moisture and add an earthy depth to the gravy.
- Red wine style without alcohol — swap 1/2 cup of the beef broth for 1/2 cup of unsweetened grape juice plus 1 tablespoon of balsamic vinegar for a wine-like acidity and sweetness.
- Smoky paprika twist — add 1 teaspoon of smoked paprika with the tomato paste. The subtle smokiness mimics a slow-cooked, fire-roasted flavor.
- Root vegetable heavy — replace half the potatoes with parsnip chunks added at the same time. Parsnips bring a sweet, nutty note that pairs well with beef.
- Herb-forward version — double the thyme and add 2 sprigs of fresh sage. The stronger herb presence makes the gravy taste brighter and more aromatic.
- Spicy kick — stir 1/2 teaspoon of crushed red pepper flakes into the braising liquid. The heat sits in the background and perks up the richness.
Storing Joy of Cooking Pot Roast: Best Practices
The flavors actually improve after a night in the fridge, so leftovers are a genuine bonus here.
- Refrigerator storage — cool the meat, vegetables, and gravy completely, then store together in an airtight container for up to 4 days. The gravy thickens as it chills, which makes it cling to the meat even better.
- Freezer storage — freeze sliced meat, vegetables, and gravy together in a freezer-safe container or bag for up to 3 months. Freezing them together keeps everything moist and flavor-packed.
- Portion freezing — divide into single-serving containers before freezing so you can thaw only what you need for a quick weeknight meal.
- Separating components — store gravy separately if you plan to use the beef for sandwiches or tacos; it prevents the meat from becoming soggy during storage.
Reheating Joy of Cooking Pot Roast: Best Practices
Low and slow reheating keeps the meat from drying out, no matter which method you choose.
- Stovetop — warm in a covered pot over low heat with a splash of beef broth, about 15–20 minutes until heated through. The added broth revives the gravy.
- Microwave — heat individual portions at 70% power in 90-second intervals until hot. Lower power prevents the meat from seizing up and turning tough.
- Oven — place in a covered baking dish with a few tablespoons of broth and warm at 300°F / 149°C for 20–25 minutes. This works best for larger portions.
- Crisping in a skillet — for leftover shredded beef, crisp it in a hot skillet over medium-high heat for 2–3 minutes per side. This creates browned edges perfect for tacos or sandwiches.
FAQs
Can I freeze Joy of Cooking Pot Roast?
Yes, this dish freezes well for up to 3 months. Keep the sliced meat, vegetables, and gravy together in a freezer-safe container or bag, then thaw overnight in the refrigerator before reheating.
How long does Joy of Cooking Pot Roast last in the fridge?
Stored in an airtight container, the meat and gravy stay good for up to 4 days. The flavor often tastes deeper on day two as the ingredients continue to meld.
Why is my pot roast tough?
Tough pot roast is almost always undercooked, not overcooked. Chuck roast needs to reach 200–210°F / 93–99°C internally so the connective tissue melts into gelatin. If a fork meets resistance, return it to the oven and braise longer.
Can I make Joy of Cooking Pot Roast in a slow cooker?
You can, but the results will differ slightly. Sear the meat and sauté the vegetables on the stovetop first, then transfer everything to a slow cooker on low for 6–8 hours. The oven method gives you more control over the liquid reduction and gravy consistency.
What cut of beef should I use for pot roast?
Beef chuck roast is the best choice. It has enough marbling and connective tissue to become silky-tender during the long braise. Leaner cuts like round or sirloin tend to dry out and turn stringy.
Can I make this recipe ahead of time?
Absolutely. Cook the dish a day ahead, refrigerate it overnight, then reheat gently on the stovetop. The rested gravy and meat flavors come together beautifully, and you save yourself the day-of cooking time.
Final Words
A Joy of Cooking Pot Roast rewards patience more than any fancy technique. The sear, the slow braise, and the rest all work together to turn an inexpensive cut of beef into something that feels like a celebration. Make it once, follow the simmer cues, and you will have a recipe that never leaves your rotation.
Print
Joy of Cooking Pot Roast
- Prep Time: 25
- Cook Time: 180
- Total Time: 205
- Yield: 4 1x
- Category: Main Course
- Method: Braising
- Cuisine: American
Description
A deeply savory, fork-tender pot roast braised low and slow in a rich beef broth with aromatic vegetables, garlic, and herbs. The beef develops a beautiful mahogany crust from searing, then melts into a silky gravy with carrots and onions that absorb all the braising liquid’s concentrated flavor.
Ingredients
- 3 lb beef chuck roast, tied with kitchen twine if necessary
- 2 tsp kosher salt, divided
- 1 tsp freshly ground black pepper, divided
- 2 tbsp vegetable oil
- 2 tbsp unsalted butter
- 1 large yellow onion, cut into 1/2-inch wedges
- 3 medium carrots, peeled and cut into 2-inch chunks
- 3 celery stalks, cut into 2-inch chunks
- 4 garlic cloves, smashed and peeled
- 2 tbsp tomato paste
- 2 tbsp all-purpose flour
- 2 cups low-sodium beef broth
- 1 cup water
- 2 bay leaves
- 4 sprigs fresh thyme
- 1 sprig fresh rosemary
- 1 tbsp Worcestershire sauce
- 1 lb baby Yukon Gold potatoes, halved if larger than 1 1/2 inches
- 1 tbsp fresh parsley, finely chopped, for garnish
Instructions
- Remove the chuck roast from the refrigerator 45 minutes before cooking to take the chill off, which helps it sear evenly. Pat the roast completely dry on all sides with paper towels — surface moisture is the enemy of a good crust. Season all sides generously with 1 1/2 teaspoons of the kosher salt and 3/4 teaspoon of the black pepper, pressing the seasoning into the meat.
- Preheat the oven to 325°F / 163°C with the rack positioned in the lower third of the oven. In a large Dutch oven or heavy-bottomed pot with a tight-fitting lid set over medium-high heat, add the vegetable oil. Heat until the oil shimmers and just begins to ripple, about 2–3 minutes.
- Carefully place the seasoned roast into the hot oil, laying it away from you to avoid splatter. Sear undisturbed for 4–5 minutes until the bottom develops a deep brown, caramelized crust that releases easily from the pot. If the meat sticks, give it one more minute — it will release on its own when properly browned.
- Turn the roast using sturdy tongs and sear the remaining sides, 3–4 minutes per side, until the entire surface is deeply browned. This browning step builds the foundation of flavor through the Maillard reaction. Transfer the seared roast to a large plate and set aside.
- Reduce the heat to medium and add the butter to the same pot. Once the butter foams and the foam subsides, add the onion wedges, carrots, and celery. Cook, stirring occasionally with a wooden spoon and scraping up the browned bits from the bottom, until the vegetables begin to soften and the onions turn translucent at the edges, about 6–7 minutes.
- Add the smashed garlic cloves and tomato paste to the vegetables. Stir constantly for 1–2 minutes until the tomato paste darkens from bright red to a deep brick color and the garlic is fragrant, being careful not to let the tomato paste scorch on the bottom of the pot.
- Sprinkle the flour evenly over the vegetables and stir continuously for 1 minute to cook out the raw flour taste. Pour in the beef broth and water slowly while stirring to prevent lumps from forming. Add the bay leaves, thyme sprigs, rosemary sprig, Worcestershire sauce, the remaining 1/2 teaspoon salt, and the remaining 1/4 teaspoon black pepper. Scrape the bottom and sides of the pot with the wooden spoon to incorporate every bit of browned flavor.
- Return the seared roast to the pot, nestling it down into the liquid; the liquid should come approximately halfway up the sides of the roast, not fully submerge it. The roast should sit partially above the liquid so the exposed top develops color and concentrated flavor during braising. Bring the liquid to a gentle simmer over medium heat, then cover with the lid.
- Transfer the covered pot to the preheated 325°F / 163°C oven. Braise for 2 hours, checking once at the 1-hour mark to ensure a gentle simmer is maintained — you should see slow, lazy bubbles, not a rolling boil. If the liquid is bubbling too vigorously, reduce the oven temperature to 300°F / 149°C.
- After 2 hours, carefully remove the pot from the oven and uncover. Add the halved baby Yukon Gold potatoes, nestling them into the braising liquid around the meat. Cover and return to the oven for an additional 45 minutes to 1 hour.
- Test for doneness by inserting a fork into the thickest section of the roast and twisting gently. The meat should offer almost no resistance and separate into shreds easily. For precise doneness, the internal temperature of well-braised chuck should read 200–210°F / 93–99°C, when the connective tissue has fully converted to gelatin.
- Carefully transfer the roast from the pot to a cutting board. Tent loosely with aluminum foil and let rest for 10–15 minutes — this rest time allows the muscle fibers to relax and reabsorb juices, ensuring every slice stays moist.
- While the meat rests, use a wide spoon to skim the excess fat from the surface of the braising liquid. Remove and discard the bay leaves, thyme sprigs, and rosemary sprig. Taste the gravy and adjust seasoning with additional kosher salt and black pepper as needed. If a thicker gravy is desired, simmer the liquid uncovered over medium heat for 5–10 minutes until reduced to your preferred consistency.
- Slice the rested roast against the grain into 1/2-inch thick pieces, or gently pull the meat apart into large chunks if it is fall-apart tender. Arrange on a warm serving platter surrounded by the vegetables. Spoon the rich gravy generously over the meat and vegetables, garnish with the chopped fresh parsley, and serve immediately.
Notes
Storage: Refrigerate cooled pot roast and gravy in an airtight container for up to 4 days; the flavor actually improves overnight. Freezing: Freeze sliced meat, vegetables, and gravy together in a freezer-safe container or bag for up to 3 months. Thaw overnight in the refrigerator before reheating. Reheating: Warm on the stovetop in a covered pot over low heat with a splash of beef broth until heated through, about 15–20 minutes; or microwave individual portions at 70% power in 90-second intervals until hot. Leftover pot roast can also be shredded and crisped in a hot skillet over medium-high heat for 2–3 minutes per side for tacos or sandwiches.
Nutrition
- Calories: 689
- Sugar: 7g
- Sodium: 820mg
- Unsaturated Fat: 16g
- Carbohydrates: 24g
- Fiber: 4g
- Protein: 52g
- Cholesterol: 165mg
Keywords: pot roast, joy of cooking pot roast, classic pot roast, beef pot roast, braised beef, chuck roast, comfort food, Sunday dinner, one pot meal, oven braised beef, tender beef roast, family dinner