 Anabelle McLean
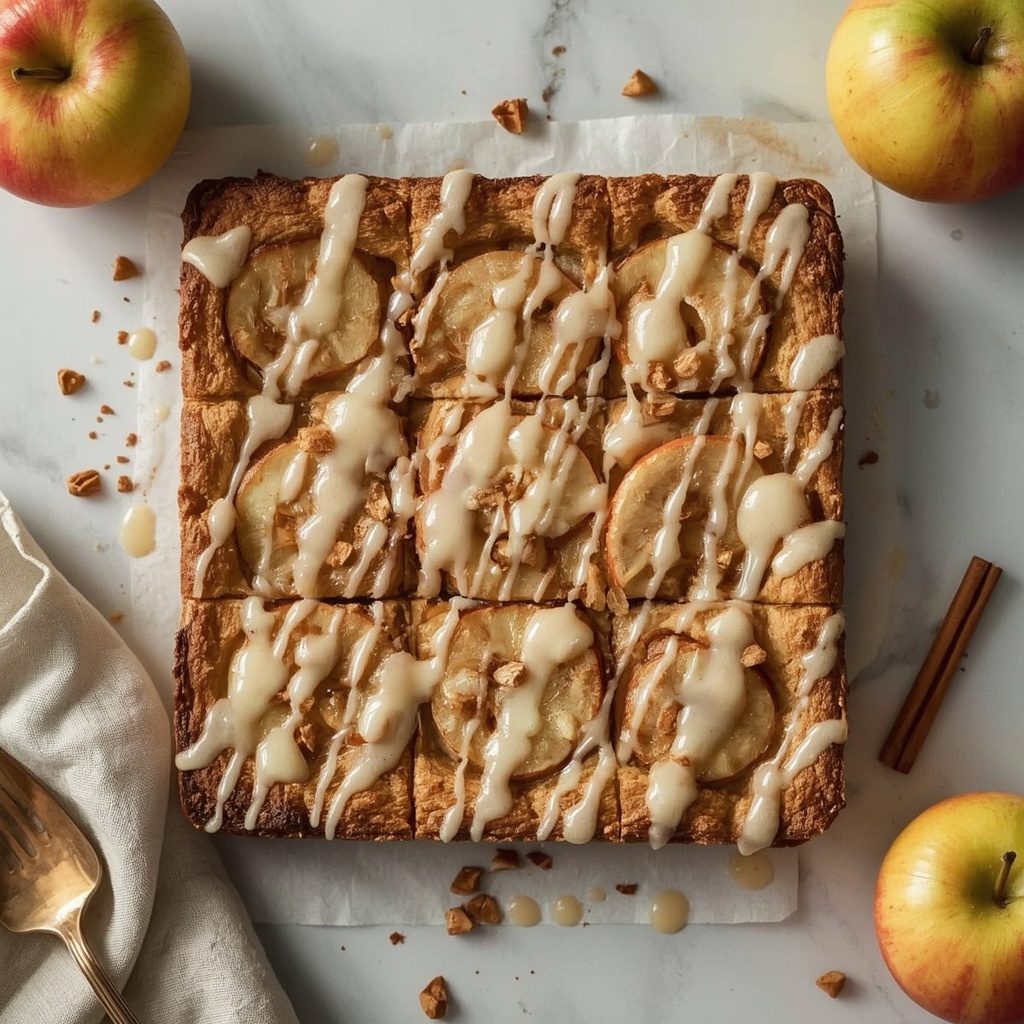
 Pioneer Woman Apple Pie Bars pack everything you love about a classic apple pie — buttery crust, cinnamon-spiced fruit, and a sweet glaze — into a neat, sliceable square. Granny Smith apples sit between a shortbread-like base and a crumbly streusel topping, so every bite gives you that warm, nostalgic flavor without needing a fork and plate. This is American comfort baking at its most practical.
You will need 80 minutes total from start to finish, and the method is squarely beginner-friendly. The only step that trips people up is cutting too early — give the bars a full hour to cool or the filling slides everywhere. Make this for a fall gathering, a holiday dessert table, or any afternoon when a regular pie feels like too much effort.
What is Pioneer Woman Apple Pie Bars?
This recipe layers thinly sliced Granny Smith apples between a pressed shortbread crust and a loose crumb topping made from the same dough. Cold butter, flour, sugar, and one egg create the tender base, while cinnamon and nutmeg season the fruit. The bars bake in an 8×8-inch pan and finish with a simple powdered sugar glaze.
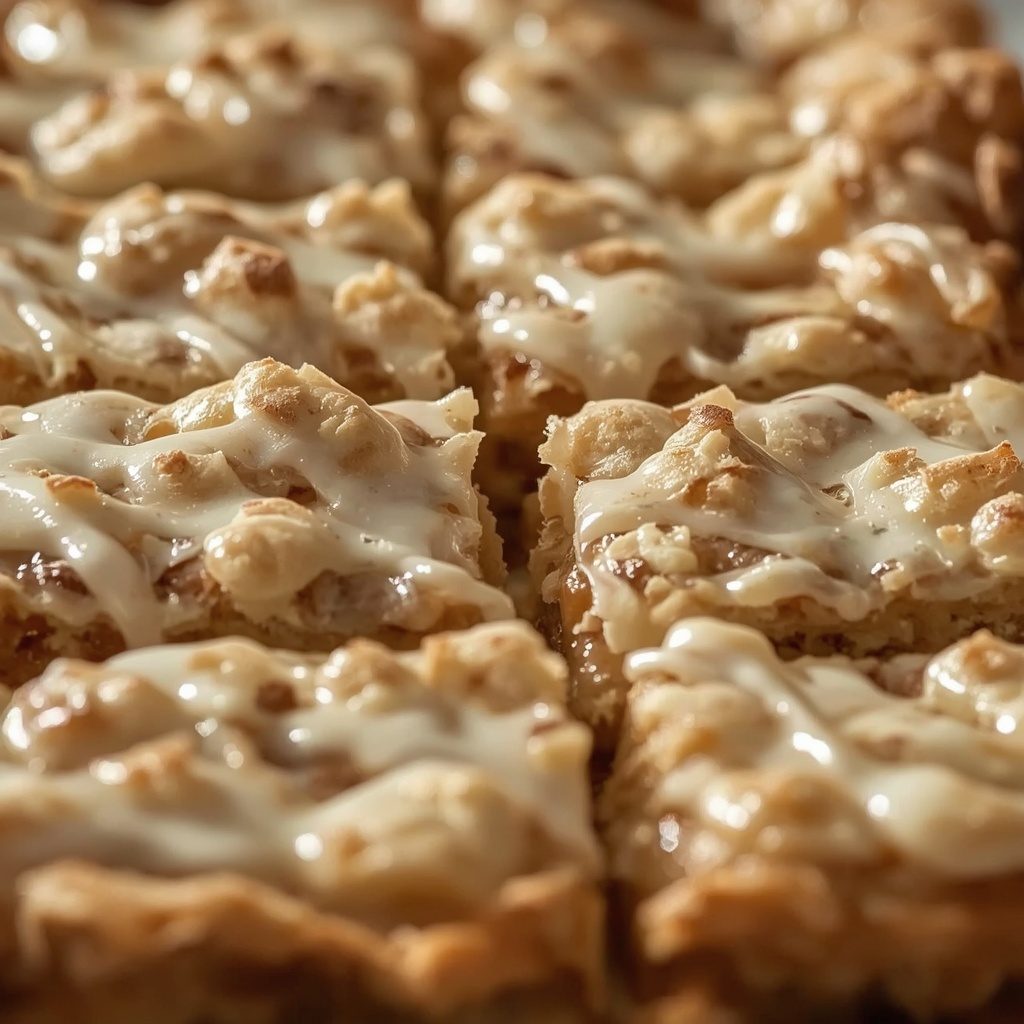
The texture lands somewhere between a soft cookie bar and a crumb-topped pie. You get crisp golden edges, a jammy apple center, and a delicate vanilla drizzle that balances the tart fruit. It is the kind of dessert that works as well with coffee as it does after a big Sunday dinner.
Why You Should Try This Recipe
- Handheld convenience — No pie server required, and each square holds together cleanly once cooled.
- Two textures in one dough — The same mixture creates both the pressed base and the crumbly top layer.
- Short ingredient list — Pantry staples and three apples are all you need.
- Make-ahead friendly — The bars store well and reheat beautifully for days afterward.
- Beginner-proof assembly — Press, layer, sprinkle, and bake. No rolling pin, no lattice work.
Ingredients Needed to Make Pioneer Woman Apple Pie Bars
Everything here is a standard baking staple, and precise measurements matter most for the crust. Here is what goes into each layer.
For the Crust and Topping
- 1 1/2 cups all-purpose flour — Gives the base its structure while keeping it tender rather than tough.
- 1/2 cup granulated sugar — Sweetens the crust without making it crisp like a cookie.
- 1/2 tsp kosher salt — Balances the sweetness in both dough and filling.
- 1/2 tsp baking powder — Adds a slight lift so the base does not bake into a dense slab.
- 3/4 cup unsalted butter, cold and cut into small cubes — Cold butter creates those distinct crumbly bits; do not soften it first.
- 1 large egg, lightly beaten — Binds the crumbs into a dough that presses easily into the pan.
For the Apple Filling
- 3 cups Granny Smith apples, peeled, cored, and thinly sliced — Granny Smiths hold their shape during the long bake and their tartness cuts through the sweet glaze. This is about 3 medium apples.
- 2 tbsp all-purpose flour — Thickens the juices the apples release so the bottom crust stays dry.
- 1/4 cup granulated sugar — Just enough sweetness to coax out the fruit’s natural caramel notes.
- 1 tsp ground cinnamon — The main warm spice that makes the filling taste like pie.
- 1/4 tsp ground nutmeg — Adds a subtle aromatic depth that cinnamon alone cannot provide.
- 1/4 tsp fine sea salt — Sharpens the apple flavor and prevents the filling from tasting flat.
For the Glaze
- 1/2 cup powdered sugar — Dissolves smoothly for a lump-free drizzle.
- 1 tbsp whole milk — Thins the glaze to the right consistency; cold milk works fine.
- 1/4 tsp vanilla extract — Rounds out the sweetness with a soft, aromatic finish.
Step by Step Instructions to Prepare Pioneer Woman Apple Pie Bars
Follow these steps in order, and keep the reserved topping cold while the filling comes together. Here is the full process.
- Preheat and prep the pan — Set the oven to 350°F / 177°C. Grease an 8×8-inch square baking pan with butter or nonstick spray, then line it with parchment paper leaving a 2-inch overhang on two opposite sides. That overhang is your handle for lifting the finished block out cleanly.
- Make the crumb mixture — In a large mixing bowl, whisk the 1 1/2 cups all-purpose flour, 1/2 cup granulated sugar, 1/2 teaspoon kosher salt, and 1/2 teaspoon baking powder until evenly combined. Add the cold cubed butter and work it in with a pastry cutter or your fingertips until the mixture looks like coarse, pea-sized crumbs with no large butter chunks left.
- Add the egg — Stir the lightly beaten egg into the crumb mixture with a fork just until moist, clumpy crumbs form. Stop as soon as it starts coming together — overworking the dough makes the crust tough instead of tender.
- Press the base layer — Press about two-thirds of the dough mixture firmly and evenly into the bottom of the prepared pan. Use the flat bottom of a measuring cup or your fingertips to compact it into a smooth layer that reaches all four corners.
- Chill the remaining crumbs — Place the remaining one-third of the crumb mixture in a small bowl and refrigerate it while you prepare the apple filling. Cold crumbs bake into distinct, crumbly clusters rather than melting flat.
- Coat the apples — In a medium mixing bowl, toss the sliced apples with 2 tablespoons all-purpose flour, 1/4 cup granulated sugar, cinnamon, nutmeg, and fine sea salt until every slice is evenly coated. The flour here thickens the juices released during baking and prevents a soggy bottom crust.
- Layer the filling — Arrange the coated apple slices over the chilled crust in an even layer, slightly overlapping the slices so everything bakes uniformly. Scrape any remaining flour-sugar mixture from the bowl over the apples for extra caramelization.
- Add the crumb topping — Remove the reserved crumb topping from the refrigerator and sprinkle it evenly over the apple layer. Do not press it down — leaving it loose is what allows the crumbs to brown and crisp up like a streusel.
- Bake — Place the pan on the center rack and bake for 50 to 55 minutes, until the topping is golden brown and the apples are tender when pierced with a paring knife. If the topping browns too quickly before the apples are done, loosely tent the pan with foil during the final 10 to 15 minutes.
- Cool completely — Remove the pan from the oven and set it on a wire cooling rack. Let the bars cool in the pan for at least 1 hour before lifting them out. Cutting while warm causes the filling to slide and the crust to crumble.
- Make the glaze — While the bars cool, whisk the powdered sugar, whole milk, and vanilla extract in a small bowl until completely smooth with no lumps. The glaze should be thick enough to drizzle slowly but thin enough to fall in ribbons.
- Glaze the slab — Once the bars are fully cooled, use the parchment overhang to lift the entire block out of the pan and onto a cutting board. Drizzle the glaze over the top using a spoon or fork, moving in a zigzag motion for even coverage.
- Set and slice — Let the glaze set for 10 to 15 minutes before slicing. Use a sharp chef’s knife to cut the block into 4 large squares, wiping the blade clean between cuts for neat edges.
What Goes Well With Pioneer Woman Apple Pie Bars
The bars are sweet, spiced, and buttery, so pairings that offer contrast — bitter, creamy, or salty — work best.
- Vanilla ice cream — A scoop melting over a warm square adds creaminess that balances the tart apples.
- Freshly brewed black coffee — The slight bitterness cuts through the glaze and brings out the cinnamon.
- Unsweetened whipped cream — Lighter than ice cream but still gives that cooling contrast against the spiced fruit.
- Sharp cheddar slices — A nod to the classic apple pie and cheddar pairing; the saltiness plays well with the sweet crust.
- Hot apple cider — Doubles down on the apple flavor while adding a cozy, seasonal warmth.
- Caramel sauce drizzle — A light drizzle over the top before serving pushes the dessert into a more indulgent territory.
Essential Tips for Perfecting Pioneer Woman Apple Pie Bars
Small details make the difference between good bars and great ones. These are the things worth paying attention to.
- Keep the butter ice-cold — Cold butter is what creates pockets of flakiness in the crust and distinct crumbs on top. If the kitchen runs warm, pop the butter back in the fridge for 10 minutes before cutting it in.
- Slice apples evenly — Uniform slices around 1/8-inch thick bake at the same rate, so you avoid some pieces turning mushy while others stay firm.
- Do not overmix the dough — Stop stirring the moment the crumbs come together after adding the egg. More mixing develops gluten and makes the base tough.
- Resist cutting early — That full hour of cooling is not negotiable. Warm filling is loose and the crust crumbles; patience gives you clean squares.
- Check at the 50-minute mark — Ovens vary, so start checking for doneness then. The topping should be golden and the apples should offer no resistance to a paring knife.
- Use the parchment overhang properly — Lift straight up with both hands for an even release. If the bars stick at the corners, run a thin knife along the ungarnished edges first.
- Wipe the knife between cuts — The glaze and sticky filling cling to the blade. A quick wipe after each cut keeps the edges clean and presentation sharp.
Variations of Pioneer Woman Apple Pie Bars
Once you have the base method down, adapting it is easy. These swaps change the flavor without touching the structure.
- Honeycrisp apple swap — Use Honeycrisp or Braeburn apples for a sweeter, softer filling. Reduce the sugar in the filling by a tablespoon since these varieties are naturally sweeter than Granny Smith.
- Brown butter version — Brown the butter for the crust, then chill it until solid before cutting it into cubes. The nutty depth transforms the entire bar.
- Maple cinnamon glaze — Replace the milk and vanilla in the glaze with 1 tablespoon of maple syrup. The maple adds a fall-friendly richness that pairs with the nutmeg.
- Add chopped pecans — Fold 1/4 cup of finely chopped pecans into the reserved crumb topping before sprinkling it over the apples. Toasting the pecans first makes them even more fragrant.
- Pear and ginger twist — Swap half the apples for thinly sliced firm pears and add 1/4 teaspoon of ground ginger to the filling spices. The pear softens the tartness and the ginger adds a gentle heat.
- Double-glaze finish — Drizzle half the glaze, let it set for 5 minutes, then drizzle the rest. The first layer soaks in slightly while the second stays glossy on top.
Storing Pioneer Woman Apple Pie Bars: Best Practices
Proper storage keeps the crust crisp and the apples from drying out. Here is how to handle leftovers.
- Room temperature container — Store the bars in an airtight container at room temperature for up to 2 days. Layer parchment between them if stacking to protect the glaze.
- Refrigerator storage — Refrigerate in a sealed container for up to 5 days. The crust softens slightly when chilled, but a quick reheat brings it back.
- Freezer wrapping — Wrap individual bars tightly in plastic wrap, then place them in a freezer bag. They keep for up to 3 months this way.
- Thawing overnight — Transfer a frozen bar to the refrigerator the night before you want to eat it. Thawing slowly prevents condensation from making the topping soggy.
- Unglazed freezing — For the best texture after freezing, freeze the bars before glazing, then add fresh glaze after thawing and reheating.
Reheating Pioneer Woman Apple Pie Bars: Best Practices
Reheating brings back the contrast between the crisp topping and soft apple layer. Choose your method based on how much time you have.
- Oven method — Place refrigerated bars on a baking sheet and warm in a 350°F / 177°C oven for 5 to 8 minutes. The dry heat re-crisps the crumbs and warms the filling evenly.
- Microwave method — For a quicker, softer texture, microwave a bar for 20 to 30 seconds. The crust will be more tender than crisp, which some people prefer.
- Air fryer method — Reheat at 325°F for 3 to 4 minutes for a crisp topping and gooey center. Keep an eye on the glaze so it does not caramelize too far.
- Toaster oven method — Set to 350°F / 177°C and warm for 4 to 5 minutes directly on the rack. This works well for a single serving when you want a crunchy edge.
FAQs
Can I freeze Pioneer Woman Apple Pie Bars?
Yes. Wrap individual bars tightly in plastic wrap, place them in a freezer bag, and freeze for up to 3 months. Thaw overnight in the refrigerator, then reheat in a 350°F / 177°C oven for 5 to 8 minutes.
How long does Pioneer Woman Apple Pie Bars last in the fridge?
Stored in an airtight container, they stay fresh for up to 5 days. The topping softens slightly when chilled, but a quick oven reheat restores much of the original texture.
Why did my bars fall apart when I cut them?
You likely sliced them while still warm. The filling needs the full hour to cool and set, so it holds together. Use a sharp knife and wipe the blade between cuts for the cleanest squares.
Can I use a different apple variety?
Yes. Firm varieties like Honeycrisp, Braeburn, or Pink Lady work well. Keep in mind that sweeter apples may require slightly less sugar in the filling.
Do I need to peel the apples?
Peeling is recommended. The skin becomes chewy during the 50 to 55 minute bake and interrupts the smooth texture of the filling.
Can I make Pioneer Woman Apple Pie Bars gluten-free?
A 1:1 gluten-free all-purpose flour blend should work in place of the regular flour for both the crust and the filling. The texture will be slightly more delicate, so let the bars cool completely before lifting them out of the pan.
Final Words
Pioneer Woman Apple Pie Bars deliver exactly what you want from a fall dessert — warm spices, tender apples, and a buttery crumb — minus the fuss of rolling out pie dough. The recipe is forgiving enough for a first-time baker and impressive enough to bring to any gathering. Make a batch this week while apples are at their peak, and watch the pan disappear faster than you expected.
Print
Pioneer Woman Apple Pie Bars
- Prep Time: 25
- Cook Time: 55
- Total Time: 80
- Yield: 4 1x
- Category: Dessert
- Method: Baking
- Cuisine: American
Description
Buttery, shortbread-like crust layered with cinnamon-spiced apples and finished with a sweet vanilla glaze. These bars deliver all the warm, nostalgic flavor of classic apple pie in a neat, sliceable handheld form.
Ingredients
- For the Crust and Topping:
- 1 1/2 cups all-purpose flour
- 1/2 cup granulated sugar
- 1/2 tsp kosher salt
- 1/2 tsp baking powder
- 3/4 cup unsalted butter, cold and cut into small cubes
- 1 large egg, lightly beaten
- For the Apple Filling:
- 3 cups Granny Smith apples, peeled, cored, and thinly sliced (about 3 medium apples)
- 2 tbsp all-purpose flour
- 1/4 cup granulated sugar
- 1 tsp ground cinnamon
- 1/4 tsp ground nutmeg
- 1/4 tsp fine sea salt
- For the Glaze:
- 1/2 cup powdered sugar
- 1 tbsp whole milk
- 1/4 tsp vanilla extract
Instructions
- Preheat the oven to 350°F / 177°C. Lightly grease an 8×8-inch square baking pan with butter or nonstick cooking spray, then line it with parchment paper, leaving a 2-inch overhang on two opposite sides so you can lift the baked bars out cleanly.
- In a large mixing bowl, whisk together the 1 1/2 cups all-purpose flour, 1/2 cup granulated sugar, 1/2 teaspoon kosher salt, and 1/2 teaspoon baking powder until evenly combined. Add the cold cubed butter and work it into the dry ingredients using a pastry cutter or your fingertips until the mixture resembles coarse, pea-sized crumbs with no large butter chunks remaining.
- Add the lightly beaten egg to the crumb mixture and stir with a fork just until the dough starts to come together into moist, clumpy crumbs. Avoid overmixing, as overworking the dough will make the crust tough instead of tender and shortbread-like.
- Press about two-thirds of the dough mixture firmly and evenly into the bottom of the prepared pan to form the base crust. Use the flat bottom of a measuring cup or your fingertips to compact it into a smooth, even layer that reaches all four corners.
- Place the remaining one-third of the crumb mixture in a small bowl and refrigerate it while you prepare the apple filling. Keeping this topping cold ensures it bakes into distinct, crumbly clusters rather than melting into a flat layer.
- In a medium mixing bowl, toss the sliced apples with 2 tablespoons all-purpose flour, 1/4 cup granulated sugar, cinnamon, nutmeg, and fine sea salt until every slice is evenly coated. The flour thickens the juices the apples release during baking, preventing a soggy bottom crust.
- Arrange the coated apple slices over the chilled crust in the pan in an even layer, slightly overlapping the slices so the filling bakes uniformly. Scrape any remaining flour-sugar mixture from the bowl over the apples for extra caramelization.
- Remove the reserved crumb topping from the refrigerator and sprinkle it evenly over the top of the apple layer. Do not press it down; leaving it loose allows the crumbs to brown and crisp up like a streusel during baking.
- Bake the bars on the center rack for 50 to 55 minutes, until the topping is golden brown and the apples are tender when pierced with a paring knife. If the topping browns too quickly before the apples are done, loosely tent the pan with foil during the final 10 to 15 minutes.
- Remove the pan from the oven and place it on a wire cooling rack. Let the bars cool completely in the pan for at least 1 hour before lifting them out, as cutting while warm will cause the filling to slide and the crust to crumble.
- While the bars cool, make the glaze by whisking the powdered sugar, whole milk, and vanilla extract in a small bowl until completely smooth with no lumps. The glaze should be thick enough to drizzle slowly but thin enough to fall in ribbons.
- Once the bars are fully cooled, use the parchment overhang to lift the entire block out of the pan and onto a cutting board. Drizzle the glaze over the top using a spoon or fork, moving in a zigzag motion for even coverage.
- Let the glaze set for 10 to 15 minutes before slicing. Using a sharp chef’s knife, cut the block into 4 large squares, wiping the blade clean between cuts for neat, clean edges.
Notes
Store apple pie bars in an airtight container at room temperature for up to 2 days, or refrigerate for up to 5 days. To freeze, wrap individual bars tightly in plastic wrap and place in a freezer bag for up to 3 months; thaw overnight in the refrigerator. Reheat refrigerated bars in a 350°F / 177°C oven for 5 to 8 minutes until warmed through, or microwave for 20 to 30 seconds for a softer texture.
Nutrition
- Calories: 584
- Sugar: 50g
- Sodium: 310mg
- Unsaturated Fat: 15g
- Carbohydrates: 85g
- Fiber: 3g
- Protein: 6g
- Cholesterol: 105mg
Keywords: pioneer woman apple pie bars, apple pie bars, apple bars recipe, apple dessert bars, cinnamon apple bars, shortbread apple bars, easy apple dessert, fall baking, sheet pan dessert, glazed apple bars